Fibofighting Resources

Search This Blog

Wednesday, 18 June 2014

A new Baby Boy in our family :)

I am so chuffed my awesome cousin and his fiancee have just had a little baby boy :)

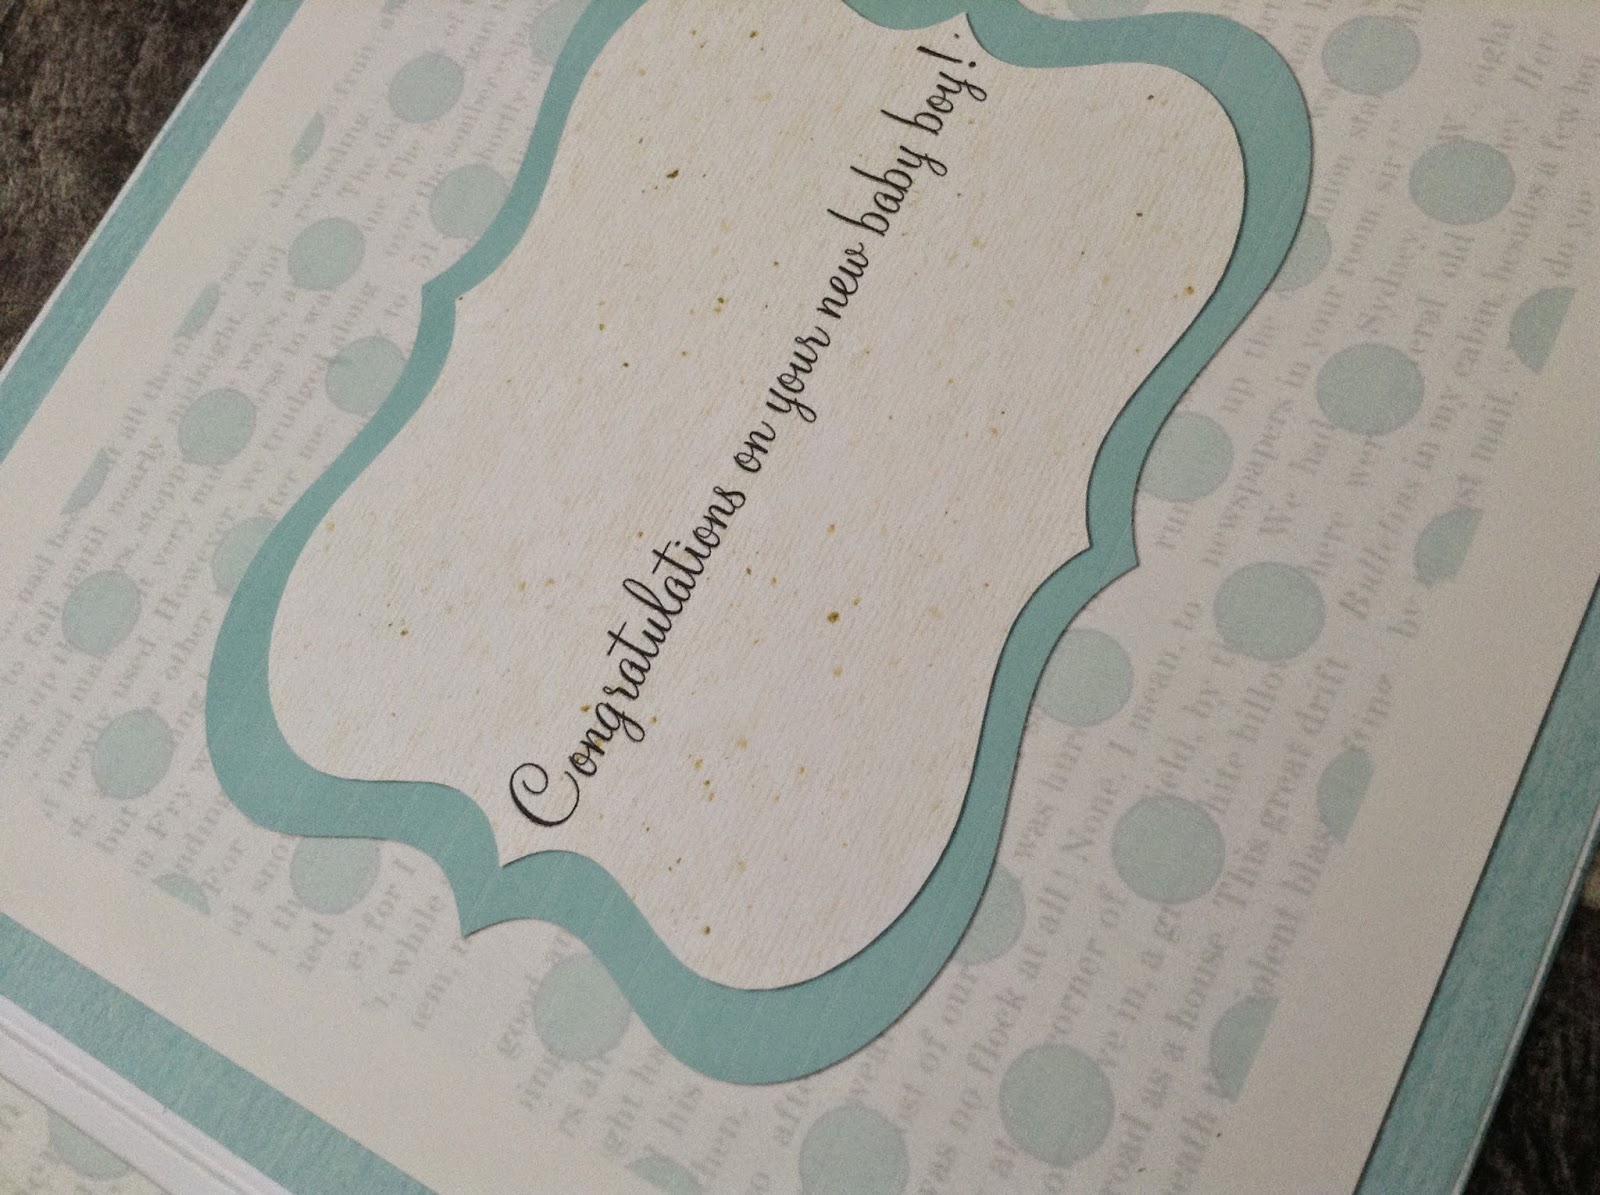
I made this card to send to them, my first new baby card


I used distress inks in broken china and a little squeezed lemonade also faded jeans just around the edges.  I place the tattered lace "pram" die cut in the bottom left corner and when I peeled it off to leave the white I then added the pram on the inside

The die cut I used to leave a white image on the front used inside 

I used Craft Artist to make an insert, was super chuffed to find a colour that matched perfectly,  I love how easy it is to make work look mat and layered without the glue and layers using craft artist.

This really is a flat piece of paper
I also added some acetate to back the hole I cut out of the front, printed off a stork and baby 3 times,  decoupaged the stork and baby and place them on the front of the acetate.

the baby's head and stork wings are more dimensional than they look in this photo
I then added a metal "celebrate embellie and the "With Love" letters I cut off from a larger die cut.
I can't wait to meet Elliot :)


Tuesday, 17 June 2014

Tim Holtz Tags of 2014 Challenge - June

Hi all, I haven't posted a tag to Tim Holtz yet and you may think I'm a little late to the game, after all it's June. However, I'm only late with sharing my crafty creations, until today I have been a secret joiner inner ;). I took a deep breath and shared my crafty creations so I could join in with the Compendium of Curiosities Challenges and nothing awful happened, so I now feel brave enough to share my tag too :)

My first tag to see the light of blogdom
If you want to learn the technique used to create the background, and it is a brill one, pop over to Mr Holtz's blog.  He teaches a new technique monthly and invites us all to playalong and enter a comp using the new method.  I really loved this one and have lots of nice backgrounds ready for... well only time will tell ;)

I used the Doily layering mask and mini distress inks set 2, fired brick, salty ocean, mustard seed and seedless preserves. There are some fab comps at the mo to win the new sets, links can be found on Tim's blog here.  I loved the look of the tag but was unsure how I wanted to proceed, I was clearing up kitchen roll I had used during the process to pop in the bin but was thinking how lovely it was.... and a dress was born!
 I used the same method on a die cut mannequin only blotting some off to give a more muted effect

I scrunched up the tissue carefully then dried with my heat tool.  There have been lots of mannequis around lately and I love them all.  I cut a semicircle for the skirt half,  pleated and glued into place on the die cut mannequin.


I then picked one of the brightest purple sections for the top and added a little more purple layering with the doily mask.  I cut a neckline, dyed some bakers twine with the mini distress inks and wrapped around the middle. This covered two jobs, it looks like a belt with a little brass bit in the centre and hides the join between skirt and top.


And then onto composition and embellishing :)   I used a ruler and cotton reel from Tim Holtz idea-ology salvage sticker book and covered the tag hole with a reinforcer also from the idea-ology range.  I browsed trough my box of bits and chose some buttons, brass embellies, corners and a safety pin instead of ribbon to hang the tag from.   It still looked incomplete... so I die cut a cotton reel stained it up and treated it to this months technique. Then I dyed some more bakers twine and wrapped the twine around the reel, behind the dress and finished it off down the mannequin stand.

A little bit of this a little of that leaving some of the lovely masky effect to be seen

I love how this tag turned out :) I had thought to pop it in my box of tags , however, it has been claimed by one daughter and I have an order (non paying) from my other daughter.  A success for the Mallaghan girls I hope you like it too :)

Saturday, 14 June 2014

CC3C challenge 4 -Texture paste and Masks

Before I chat about this challenge I want to share with you the winner of the last challenge, The rogue Stamper, Laurie Y created an amazing gazebo you just want to chill out in and the honorable mention went to a clever clever crafter who created an image right out of one of my fav fairy tails.  The owner of the yaya scrap and more blog made the rose from Beauty and the Beast, Genius.  Go take a look at these awesome creations it is well worth your time.

Challenge four, hosted by Linda Ledbetter and the awesome Curiosity Crew, is all about using texture paste and layering masks,  turn to page 49 of Mr Holtz's Compendium  of Curiosities book 3 for his tuition.  The Funkie Junkie Boutique are again sponsoring this round.  I had great fun experimenting with this medium and now think I have a better understanding now of how to best use masks, both with the paste and also with ink.  As fathers day is here, and I am never ahead of the card preparedness game ;) I created this with my dad in mind.

The first time I have used this type of crafting style #lovemixingitup ;)
I have only used texture paste once before on the Chest of drawers I made for my daughter which I posted previously .  Rather than just rush in (I often cant help myself) I got some tags out and had a good play around. It took me a few attempts to get a good technique going, one I felt was producing the kind of image I wanted.  I definitely recommend using masking tape, I usually don't bother if I'm using masks with ink, however, in order to get sharp, crisp lines with the paste the mask does need to be held firmly in place at all times. I used, the bubble, ray and heart masks (other stores are available ;)).
Practice makes perfect...ish
I also wanted to practice which inky technique I wanted to use.  I wanted to use sun colours, and heart colours and sea colours and grass colours... well why not purple too so rainbow it was.  I decided to use some ripped pieces of paper to create a texture effect with my inks and layers of varying depth of colour.  I used, mowed lawn, pine needles, honey mustard, squeezed lemonade, barn door, chipped sapphire, broken china and seedless preserves, Oh I do love the names.  I spritzed with water and dried with a heat tool.  I was most pleased with this practice run so used it as a kind of map for the real deal ;)  I am always amazed at how many colours you can create with a few distress inks.
Paint the whole world with a......


I used two "with love" die cuts.  I had only intended to use one, the plan was to use a resist technique by embossing with clear powder.  I wasn't happy with this look though so chopped another one up and used silicone glue on the individual letter and attached them. I do like the height it gives, best laid mistakes...


I then used gold acrylic paint on the frame and heat embossed, lovely bubbly, literally.  I ripped up the frame to fit inside the lovely texture paste and added some embellies.


Fish made with bakers twine


Some lovely brass leaves and washi tape

A brass cog hung from a safety pin and silicon glue of course

Some more brass in the shape of a heart, washi tape/  a good shot of the texture paste too
I hope my Dad likes  his Card, I have more plans for this type of crafting as I loved this process.  The only downside is I have a party to go to and am not sure my fingers will be inky free...


Saturday, 7 June 2014

One Direction!!

Am off to see 1D with my daughters tomorrow So am spending the day "chillin out maxin, relaxin all cool" to give me the best shot at the Fibro Funnies being minimal tomorrow.  It doesn't always work but if I have a hectic day I know I will pay for it as I will be on Monday.

There are a lot of things we can't do as a family since I,we, became a Fibrofighter so even tho I know I will have to out stubborn the illness tomorrow, that me and mine will pay for it a day or so after, we all agree there are just some experiences that are totally worth it, memories that we all want to share and have forever and a gig or two a year is top of our list.

Are there things you all still refuse to give up even tho you know it maybe going against what the Fibro demands?

So wish me luck, wishing you all a fun but not fibrofunny weekend :)

Hidden Slot Moneyboxes using Crafter's Companions Sweet Treats Board

Crafter's Companions June challenge is Tags, Bags and Boxes, more information can be found on their Facebook page.

I love using CCs boards to make cards, envelopes and for embossing but most of all for making bags and boxes so I was really chuffed to see this months challenge.  My daughters had asked me to make them piggy banks a while ago, I had popped the request in my crafty cranium box to let it ponder over how I wanted to craft them.  I had been thinking clay but then I saw the challenge and....
Voila, two bespoke money boxes ;)
I used the Crafter's Companion "Sweet Treats" embossing board.  This is one of my absolute favourite boards, they work perfectly every time, after a practice or two ;).  I made the boxes in the usual way, it couldn't be easier thank to the boards, but cut a slot on one side of the roof big enough to pop money in.

I do love that ring
I scored and cut out 14 roof tiles, 7 per side. and coated them in clear embossing powder to give them some extra durability as they will be rifled thru often...to put money in I hope.  I have attached the roof using only double sided tape, I would normally use wet glue too but this way when the boxes are full I can use a craft knife to get the girls their pennies, without ruining the boxes entirely.

Two different style money boxes for two awesome and different girls 
It is easy with the Crafter's Companion boards to get the basics perfect giving you free reign with creativity, I think both boxes look really different and reflect my Daughters' personalities, they LOVE them :)


I hope you like them, any questions please feel free to ask, if you are wondering about the boards I totally recommend them as I said it takes away all the tricky measuring bits and leaves you free to create and play.


Monday, 2 June 2014

CC3C 3 - A craft in time saves disappointment!

Yay! I have completed my crafty idea for the Compendium of Curiosities 3 third challenge, hosted by the fabulously talented Linda Ledbetter and sponsored by the Funkie Junkie Boutique.  My daughter loves the chest of drawers and that makes up for missing the closing time for the second challenge...just ;)  This project began life as a plain brown box.  I coated with Picket Fence distress paint and when dried used a slightly stiff brush to apply Martha Stewarts metallic paint in Champagne giving a softly distressed look.

When I thought of roses I thought of bouquets, its the summer season after all, and I have hopes a lovely lady will soon become my sister-in-law! With this in mind I wanted to create a box to keep wedding day memory trinkets safe; garter, confetti, table decs, a pressed flower and the horse shoe etc.  I originally started thinking it would be simple and clean with just a suggestion of a bouquet and a button hole, I like designing with other peoples tastes in mind yet as usual it evolved as I lost myself in my crafty cranium and voila!
A wedding memory box with a special friend in mind

I started by making the flowers using... Oh no I'm not telling, go on get the book and go to page 65, it really is worth a look or 10. I coloured my roses using another of Tim's techniques, this one isn't from the book but from the Creative Chemistry 101 online class, these classes full of Tim showing us how to work the magic.  This particular colouring style involves distress inks and drops of water on a craft mat, dragging your paper through it, heating and going back in the inky mix,  drying again  and repeating  until you are happy with the look. Tim most definitely shows how better than I can explain.  I did add Victorian velvet and Antique Linen to water misters rather then plain water tho.  I also used both in their inky form along with squeezed lemonade, old paper and tattered rose, how could I not for this challenge.
I finished them by catching the edges with Victorian Velvet, it is my colour of choice at the mo.  

These flowers look intricate but with a small amount of practice are really easy to create
When I placed the roses on the box I thought my original suggestion of a bride and groom idea was just too stark. It is definitely more decorated than I first imagined but hopefully still a simplistic distressed design.  I used my, couldn't live without, Craft Artist programme with the Steampunk parlour digikit to put together a pic of a bride and grooms torsos.  The corset for the bride is in no way suggestive of my mateys choice of clothing!
 
Craft Artist designed background

I printed it out on Crafters Companion printable acetate and then placed the box lid on top, carefully scored around the lid and gently, sometimes not so gently, encouraged the acetate to snuggle the lid.  I then trimmed the corners out and secured with doubled sided tape.  To hide the tape I rummaged through my ribbon tubs (this took nearly as long as making the box!) and secured the ribbon with more tape.  I started and completed the ribbon trim in the place I knew I was putting the bouquet ribbon so I could again hide the crafty workings.
I always try to hide sticky workings
Next I arranged the roses on top of the happy couple, I did still want to keep it fairly simple knowing who I am hoping to gift this to but the roses did need a little something something.  I made a flower out of some lovely gold ribbon, I had wanted to use ot as the lid trim but it just didn't look at home there, I think she does like residing in the middle of the bouquet tho.  I then twirled some florist wire around a cottonbud (bud removed) and placed them around the bouquet.  Finally I perused my brass embellishments and chose some little leaves to scatter around the bouquet and button hole rose and some funky ribbon threaders which I bent into shape to fit around the lower corners of the box.

Everything's coming up roses

I hope you like my latest offering to the crafty Gods, I hope my matey likes it more!  I am super chuffed to have finally worked up the nerve (and got my timing right) to enter a Compendium of Curiosities Challenge. I am now off to pester the Awesomely Brilliant Curiosity Crew to let them know I have entered, I'm not stalking them tis in the rules ;)


Photos taken by my lovely daughter, thank you hun x

Sunday, 1 June 2014

Tile be or not tile be...

So I stenciled my tiles, we worked on them all day Thursday, it was not as easy as I thought having only stenciled with distress inks before.  I loved the masks I chose from Creative Expressions "That special touch of" collection, I went with a Steampunk theme, not very bathroomy or like the patchwork design that inspired me, I thought my Son would appreciate a room that was a little less girly tho!


It was difficult to pick paint colours as I had to order them online, none of the shops in my area sold the brand I was looking for.  I was a little disappointed with some of the colours and their compatibility but I mixed a few together and was happyish. It took me about 2 hours of practicing until I started to get impressions I was happy with, and there were still many more that I fudged after the first.  All in all I think I washed more paint down my sink than I used on tiles.

However we persevered and completed the 30 tiles I needed to make a large rectangle above the bath and a few to scatter over he sink and loo as a splash-back, the other tiles were to be plain white.
A selection of my stenciled tiles

I say were to have been as am slightly disappointed to say we have not used them :( They were just not permanent enough, even tho we oven baked them, this is why I haven't mentioned the brand I used or added a linky as it is totally possible it was user error lol. They needed to withstand everyday use as well as grouting and the scrubbing needed to remove the excess, I left one in the sink overnight splashed with water, in the morning we gave it a scrub.... and the hard won image washed started to wash away.  Ah well., I am now looking for a lovely old table for the garden that is just screaming for a Mosaic tile remodel.  My bathroom is now going to be a modern fresh room with white brick shaped tiles and black, red, blue and lime green tiles randomly thrown in.

My children are very happy there is still a room free from my crafty carry-on, little do they know  I have plans for the bathroom cabinet!